Travel Module - Video
Your browser does not support HTML5 video.
Travel Module - Objective
The purpose of this module is to enable employee create travel request, get it approved and track travel details like travel from, travel to, purpose, departure date, return date, accommodation and advance details etc.
Travel Module - Roles Involved
List of Roles
#
Role
Access rights
1
Employee
Request
2
Admin
Approval
3
Manager
Approval
4
Finance
Verify & Close
Users
Role
End User
All Employees
Process Owners
Enablers [GHR, GGA, GFA , Managers]
Travel Module - Key Points
Creating Travel Request
Creating, updating the Travel Tickets [GGA,GFA].
Admin
Need Approval for Admin to take an action
Manager
Manager [Level 6 & above] has access for all the request raised.
Any Approval request raised by the Employee [Manager can take necessary action like approve, reject & need more info].
Finance Approval
Need Approval for Finance to take an action
Travel Module - Create Travel Request
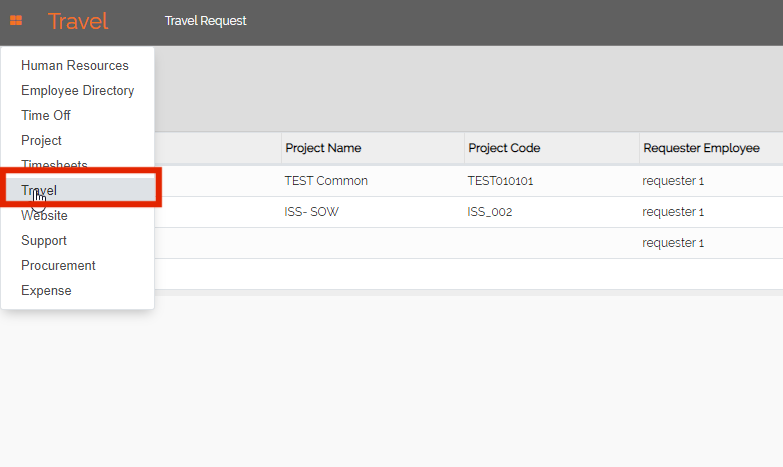
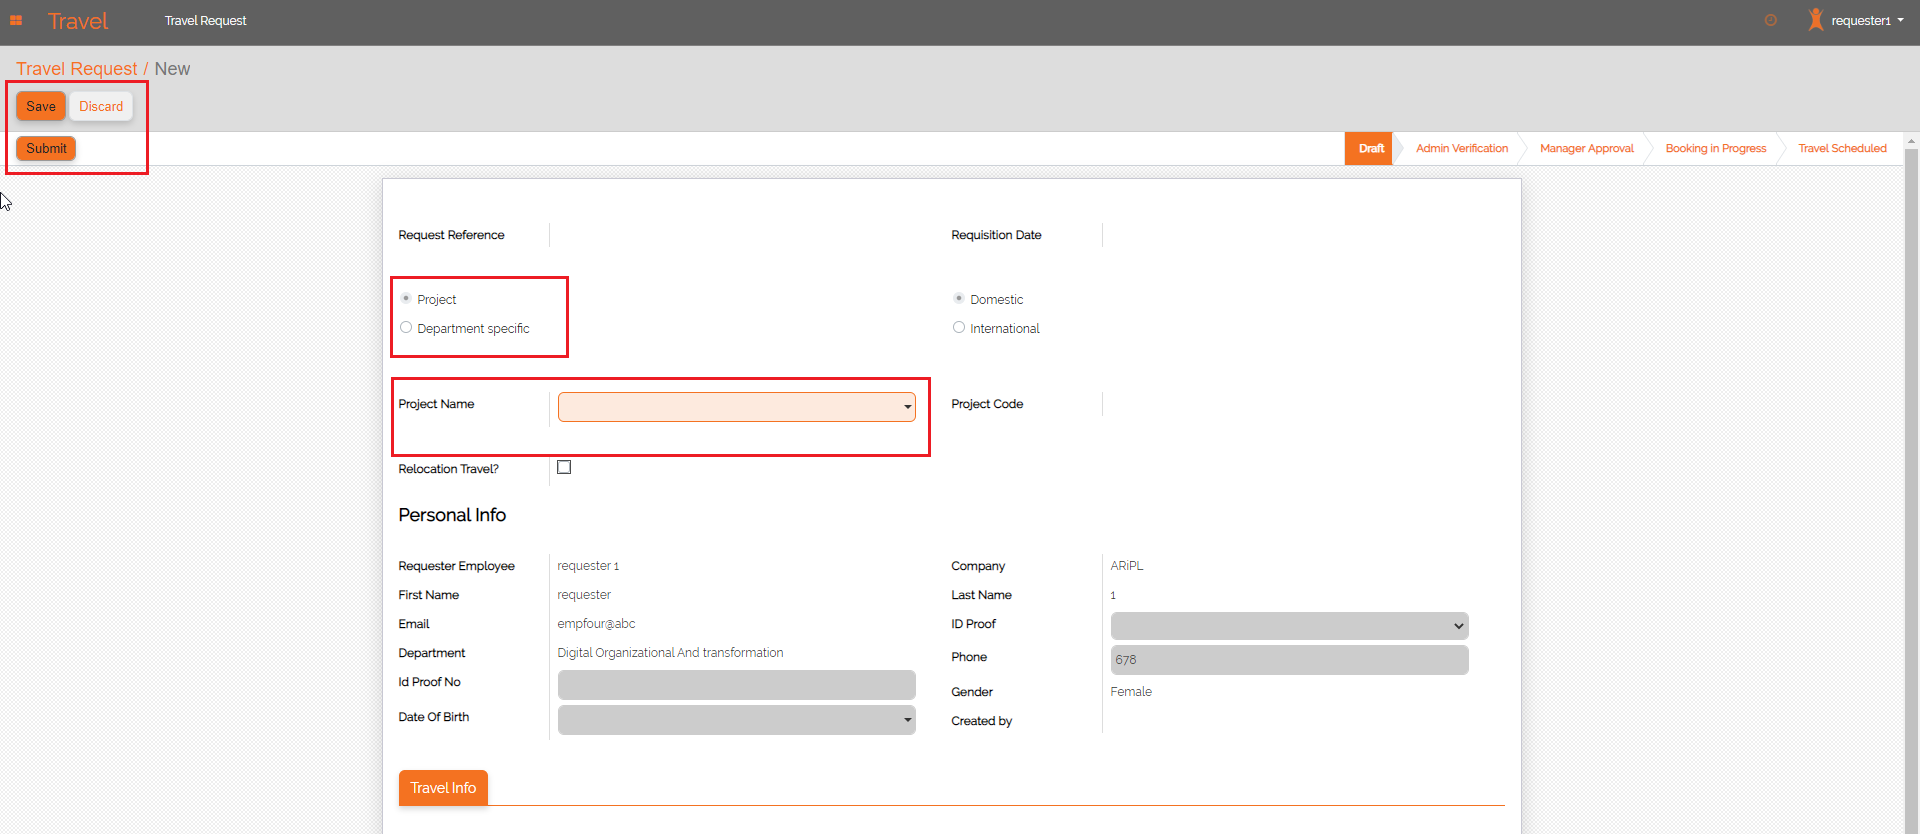
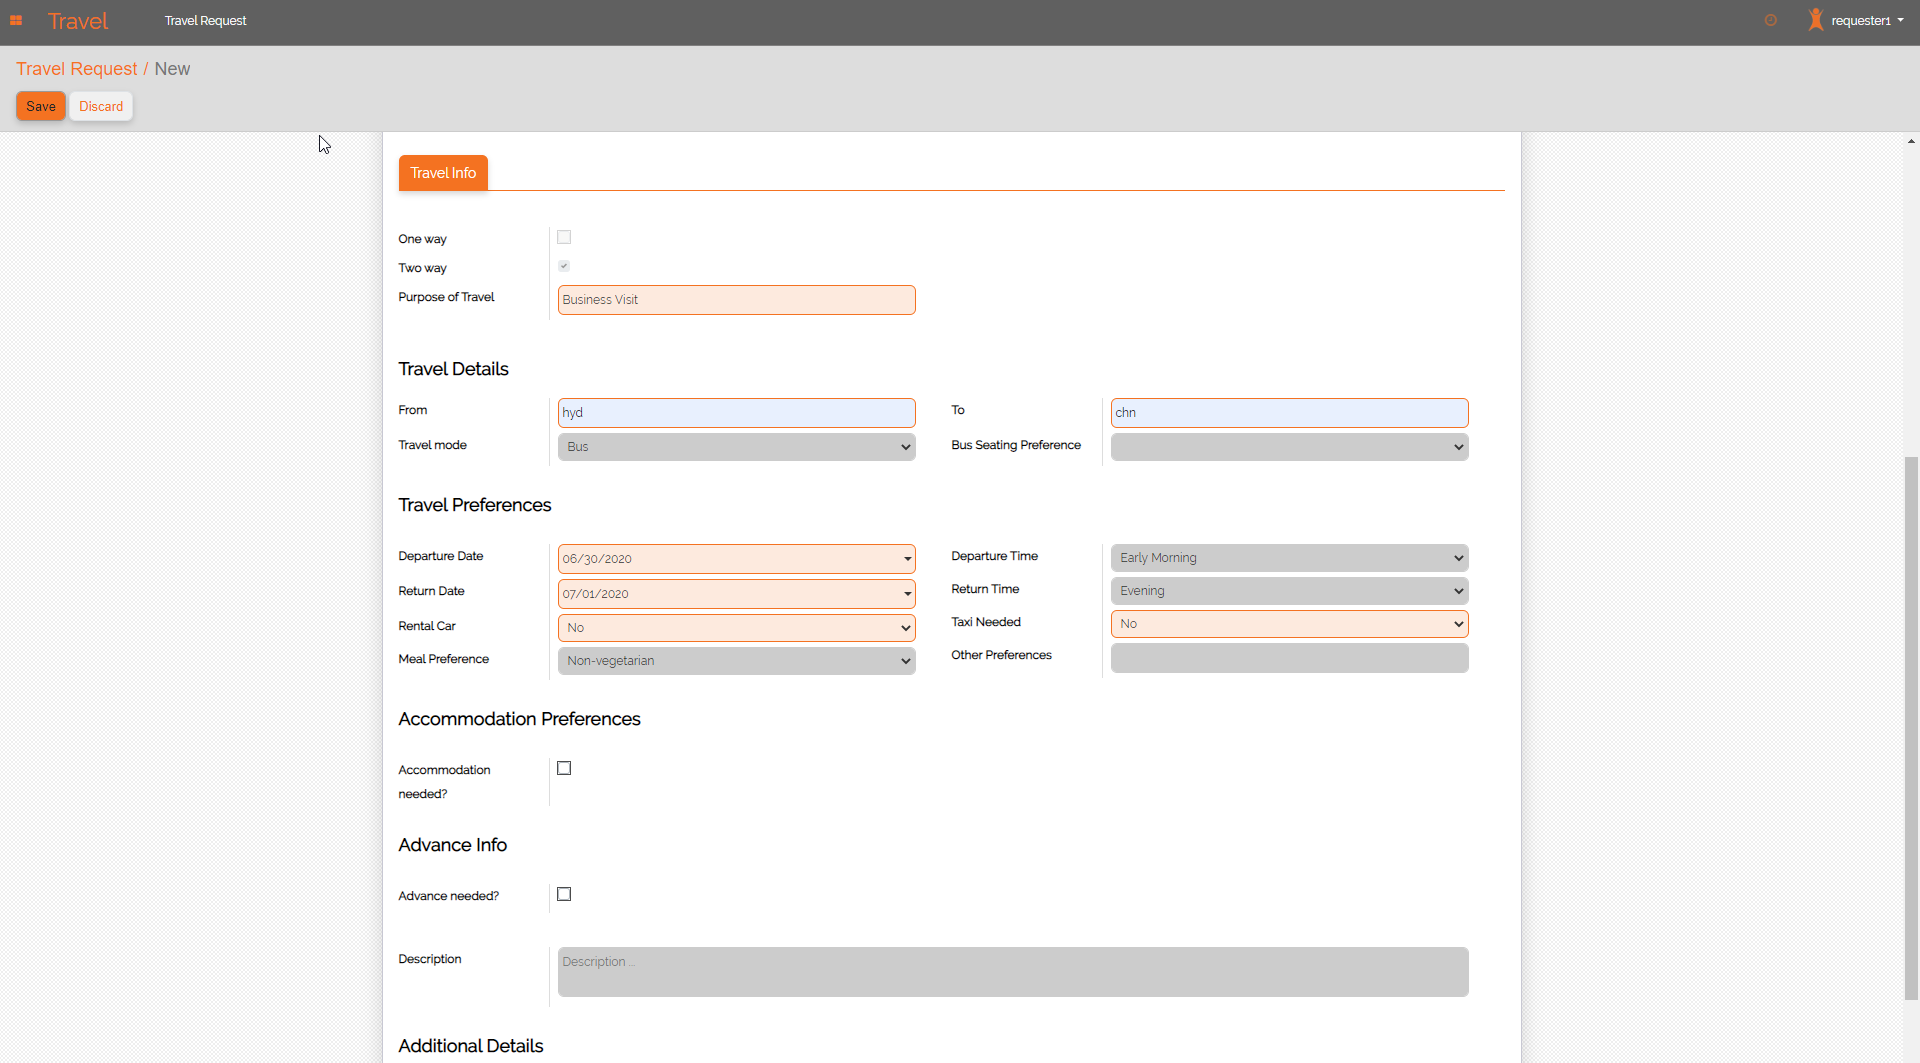
Step 1: Navigate to Travel Module by selecting Travel Request from top left corner menu button.Step 2: Then click on "create" button to create a new travel request.Step 3: If the employee selects "Project", it will give the employee options in the drop-down menu in orange of all the projects he/she is tagged to. If the employee select "Non-Project", then the project category is no longer required.Step 4: If the travel request is a relocation request, then the employee has the option to select "Is Relocation Travel?" at the top of the form.Step 5: The employee's personal information will be automatically populated. Some fields will not show depending on the employee's region due to HR regulations and confidential information. Instead it will be an optional field.Step 6: There is an option to upload proof of ID. For example, if you need to provide an ID or passport for a flight ticket. (Moving down the form, the employee will not need to enter the mandatory orange fields in the Travel information. Step 7: Once the employee is happy with their travel request, he/she will select save. The employee will have the option to edit until they select Submit. Once it's submitted, the employee will not have the option to edit.Step 8: Once the request as been submitted, the request will move to "Admin Verification" stage and will be submitted to the appropriate department.
Travel Module - Travel Admin Action
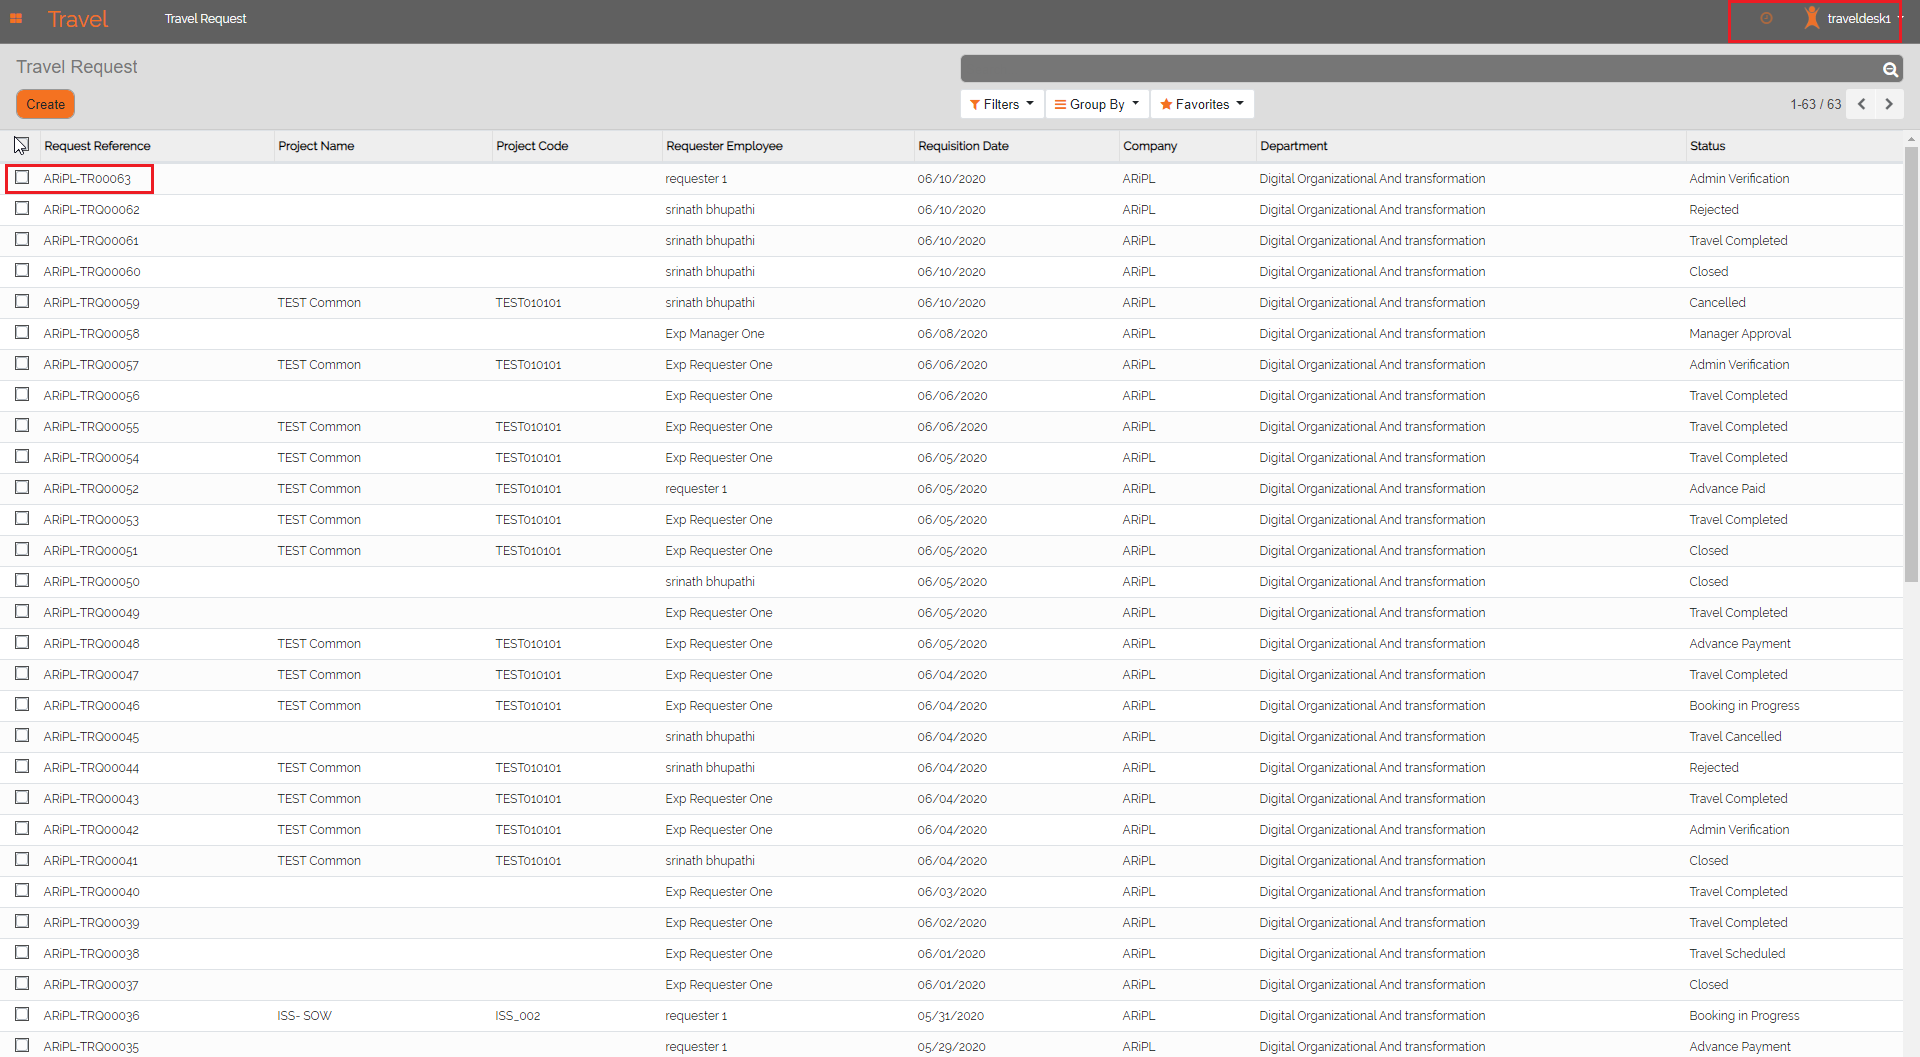
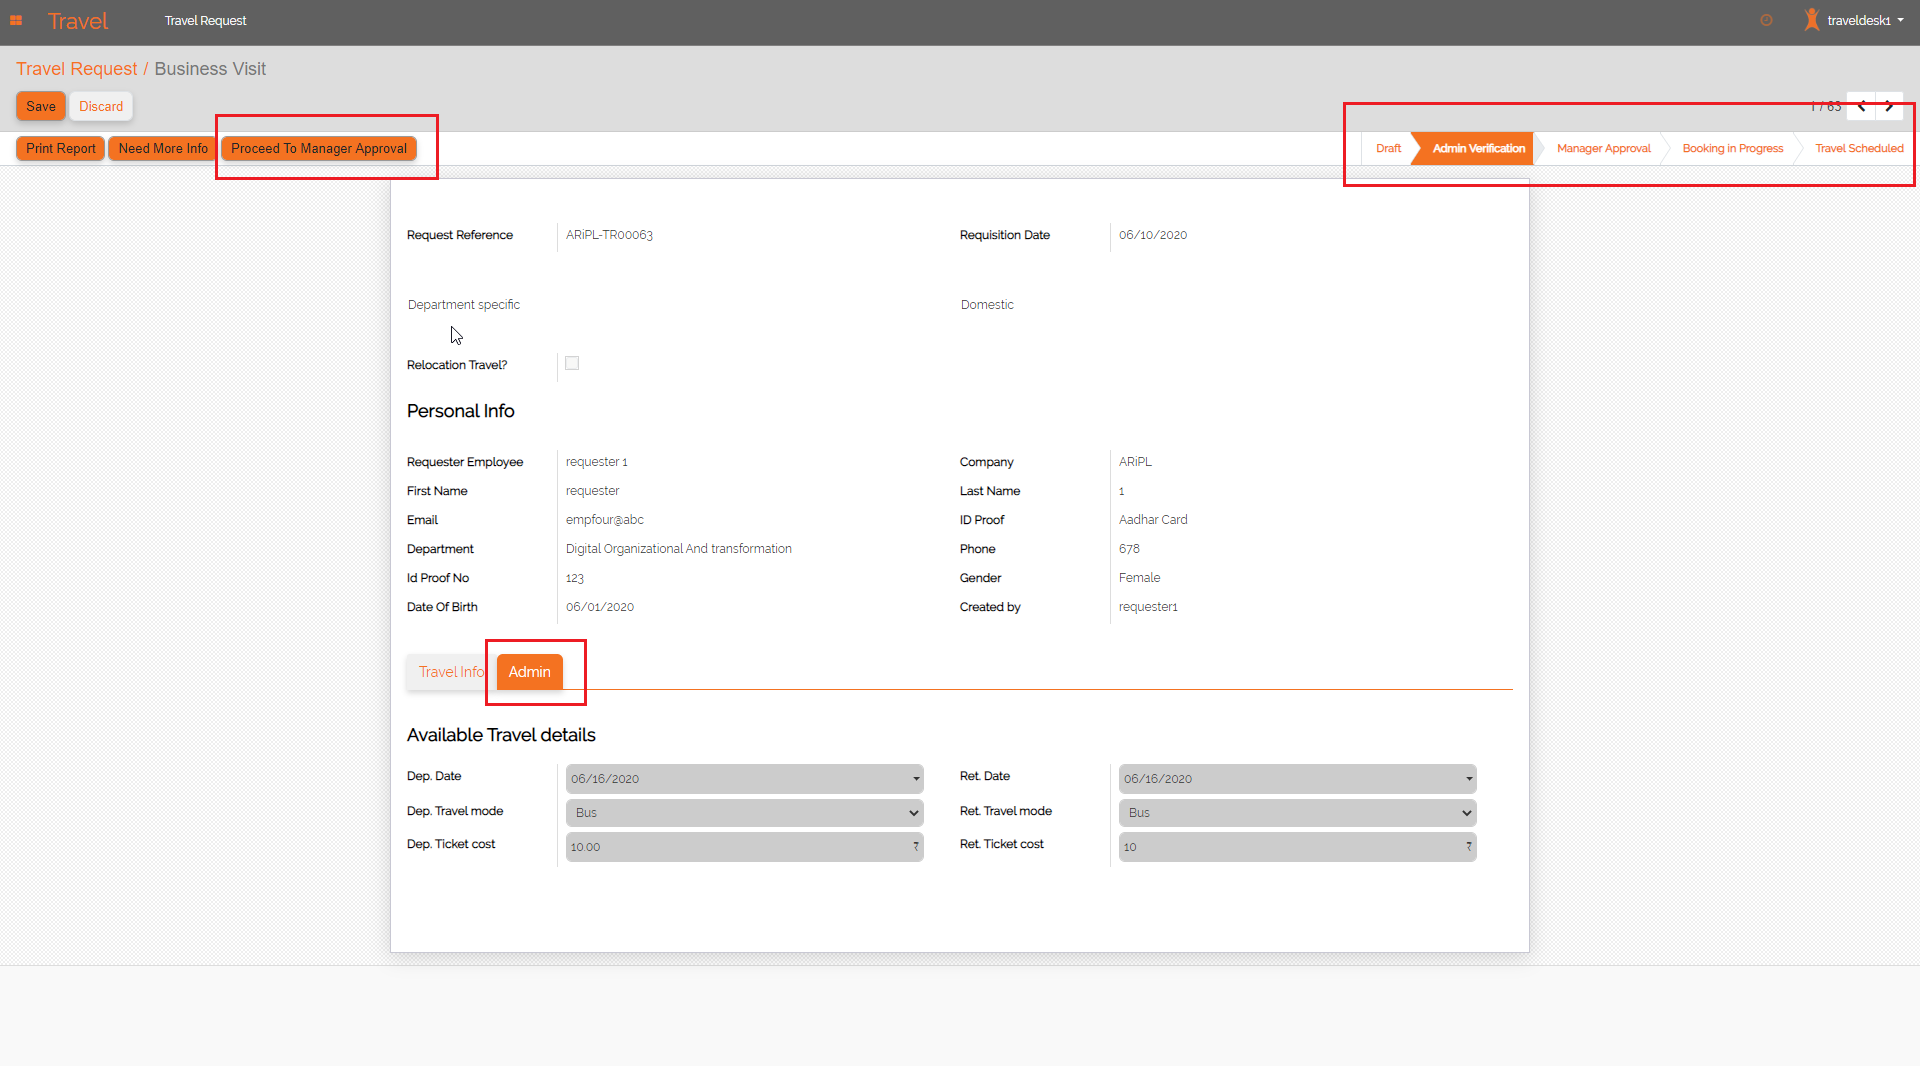
Step 1: Once selecting the module, a list of travel requests will appear. Click the travel request you would like to view and select edit.
The Admin support team will have an additional orange tab that says "admin". This is where the admin support team can provide information regarding available dates, mode of travel and cost of the ticket.
Before the request can be approved and processed, the admin support team will fill out the following fields and send it to the manager for approval.
Once saved, select "Processed to Manager Approval". Or if the admin support would need more information, he/she can select "need more info".
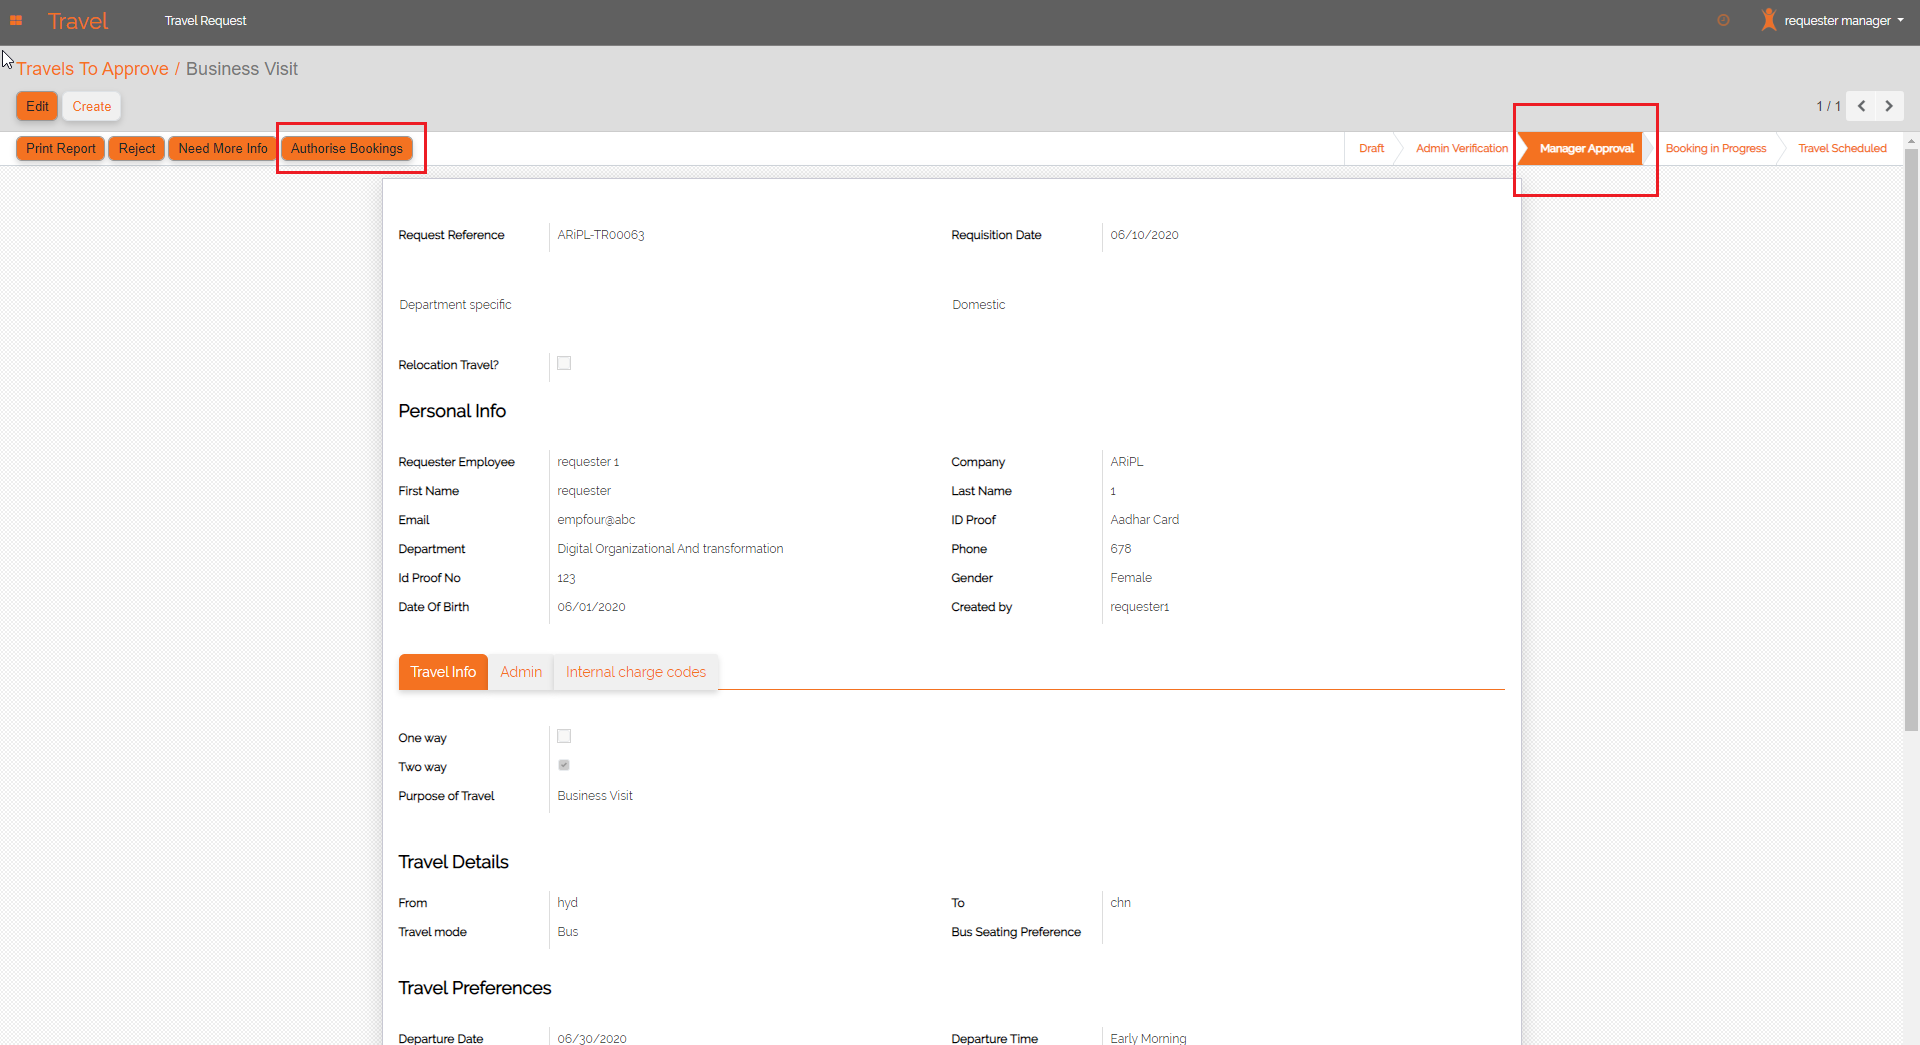
The employee's Manager will then have the option to "Print Report", "Reject", "Need More Info" or "Authorize Bookings" after reviewing the travel request.
Travel Module - Manager Action
Step 1: The manager has access to see the “Tabs” travel info, admin information and internal charge codes.Step 2: Like project and task, the manager will select a charge code that fits the category and sub-category to the travel request. The manager will need to select the travel charge code and accommodation charge code. The charge code will help expense the travel to the correct COE or project.Step 3: Once the manager has authorized the ticket, the request will move to Booking in Progress at the top of the form.
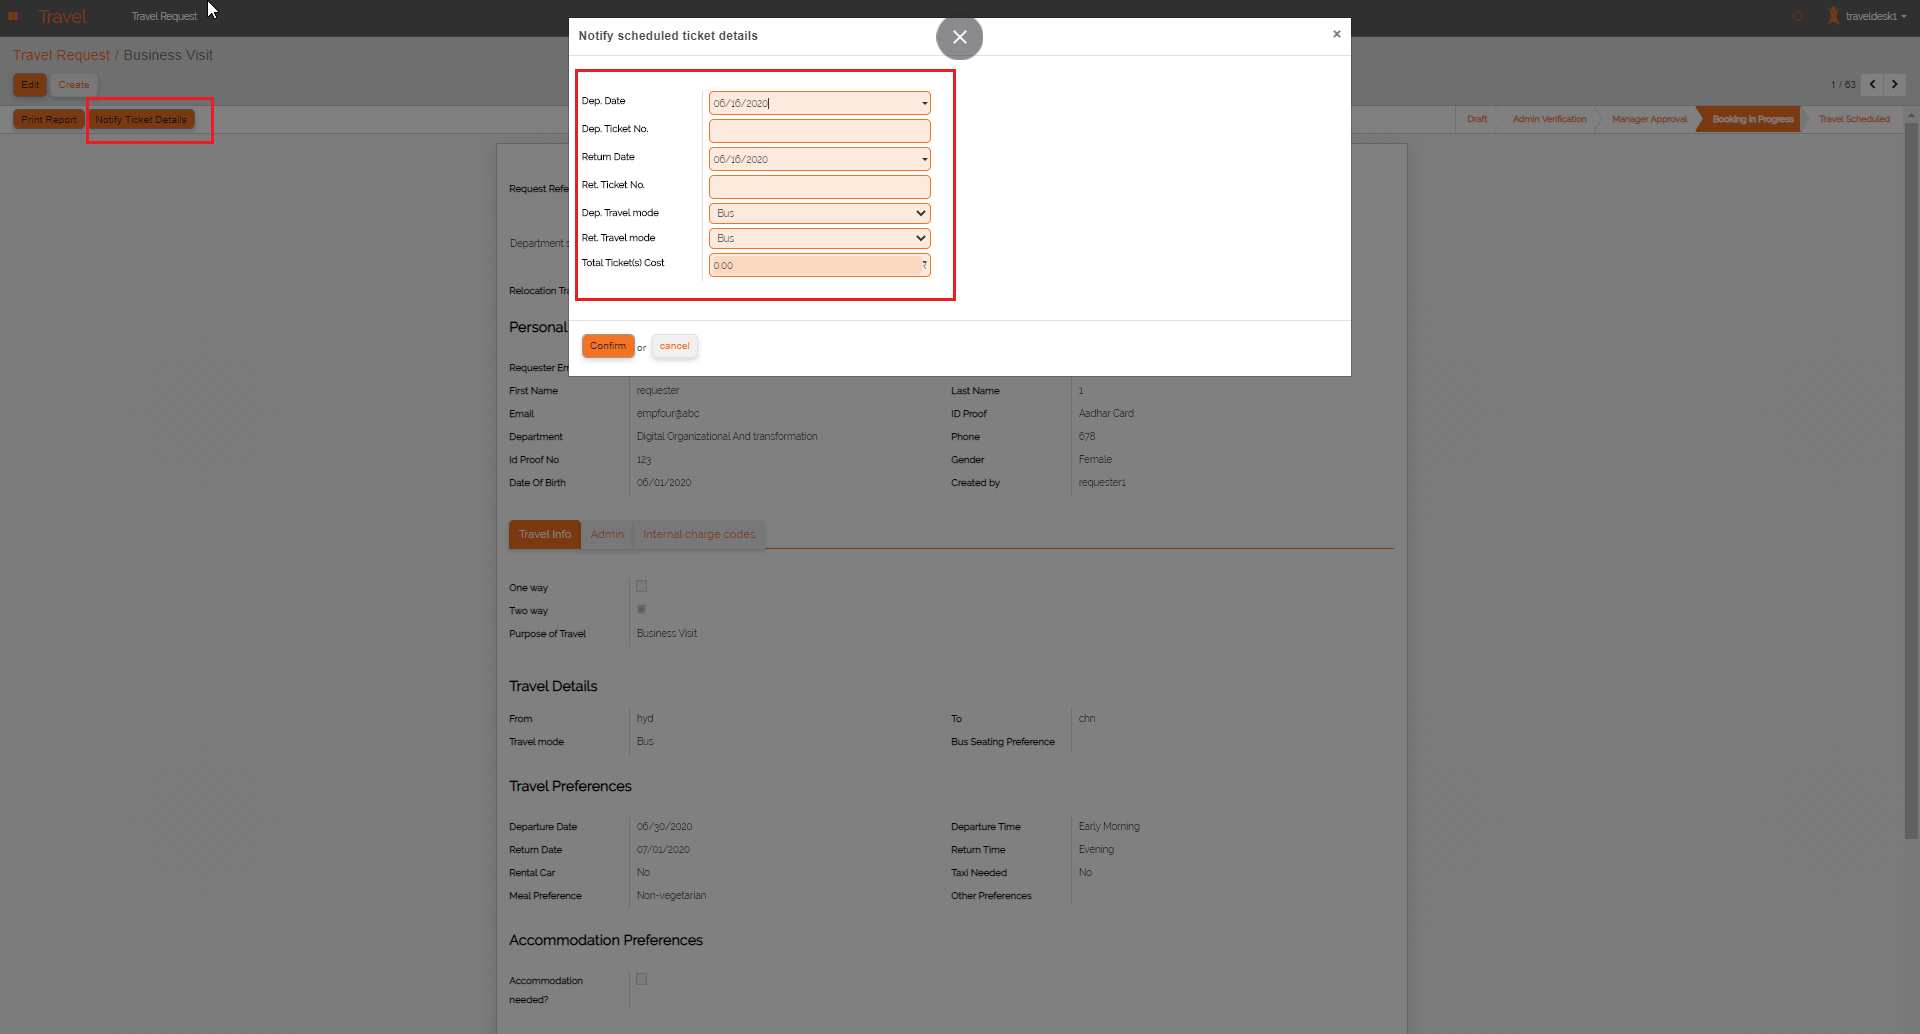
Travel Module - Admin Action
Step 1: Now the admin support team will be able to purchase the necessary mode of transportation and accommodations for the request. Once the ticket has been purchased, the admin support team can notify the employee by selecting "Notify Ticket Details".Step 2: Once everything is completed, the support team will select "Travel Done". Finance will then be notified.
Travel Module - Finance Action
Step 1: The Finance team will have an additional options [If the Employee has selected the Advance Payment options during Travel request creation]. They will also have options to see the internal charge codes and verify the appropriate codes have been selected.Step 2: The Finance can choose the Payment options & pay the amount they can be close as Paid.

